How to Clean a Revolver
A few simple steps will keep your revolver in great shape
Slaton L. White
• 6 min read
When you pull the trigger, you set in motion what is actually a controlled explosion. The hammer hits the primer in the cartridge, which in turn ignites the propellant that launches the bullet. The gases created by the process leave residue—spent powder—that must be removed if the gun is to remain in top operating condition.
Cleaning the gun is pure drudgery, but absolutely necessary. Do you have to clean it after every trip to the range? Yes. But when you perform the necessary maintenance on a regular basis, it really doesn’t take very long. Here’s how to do it correctly.
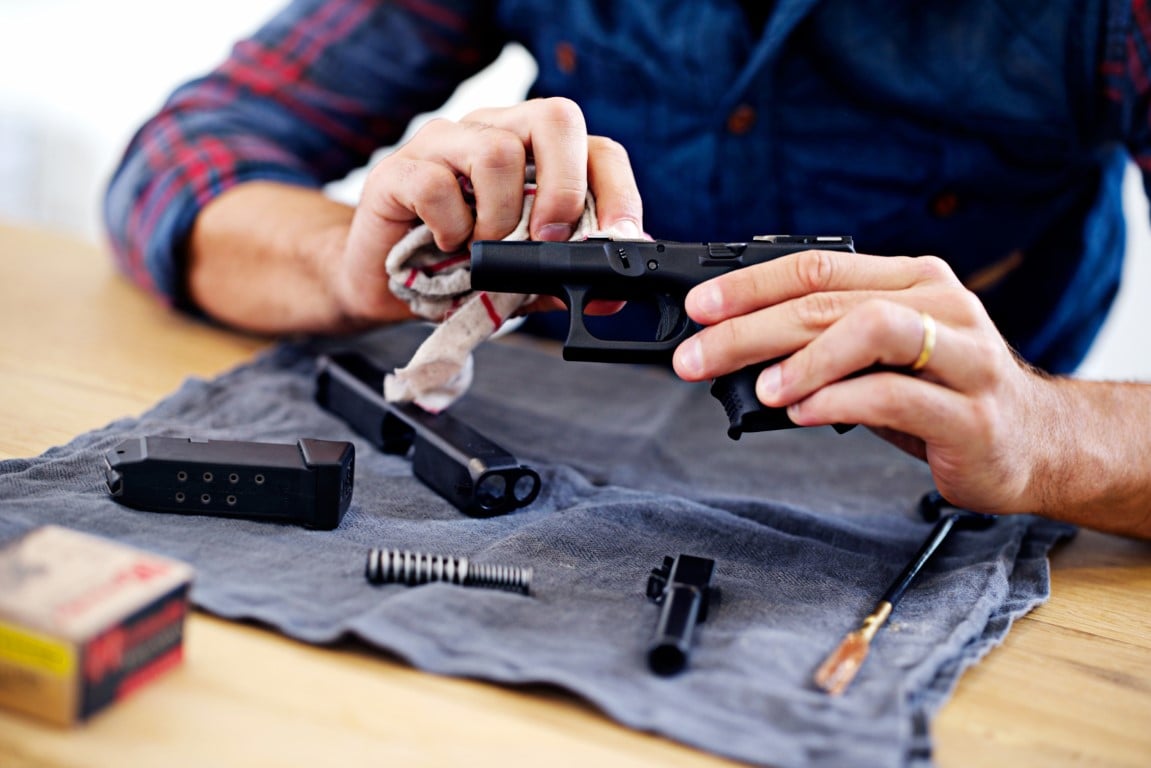
Unload the Gun
If you are target shooting, the gun should be unloaded at the range and placed in a gun case. A revolver carried on your person for self-defense will naturally still be loaded when you get home. So, the first step is to make sure you unload the gun before you go any further. If the revolver has live rounds in the chambers, make sure the gun’s hammer is uncocked. Now, with the gun pointing in a safe direction, wrap your shooting hand around the grip. Do not place your finger inside the trigger guard. The non-shooting hand wraps around the gun in front of the trigger guard, below the barrel. Open the cylinder (the exact process depends on the model of gun; check the operating manual for details). Once the cylinder is open and you have access to all the chambers, you may begin the unloading process. With the muzzle pointed up, press down on the ejector to release the cartridges. That done, place the gun on your cleaning mat.
Take Stock
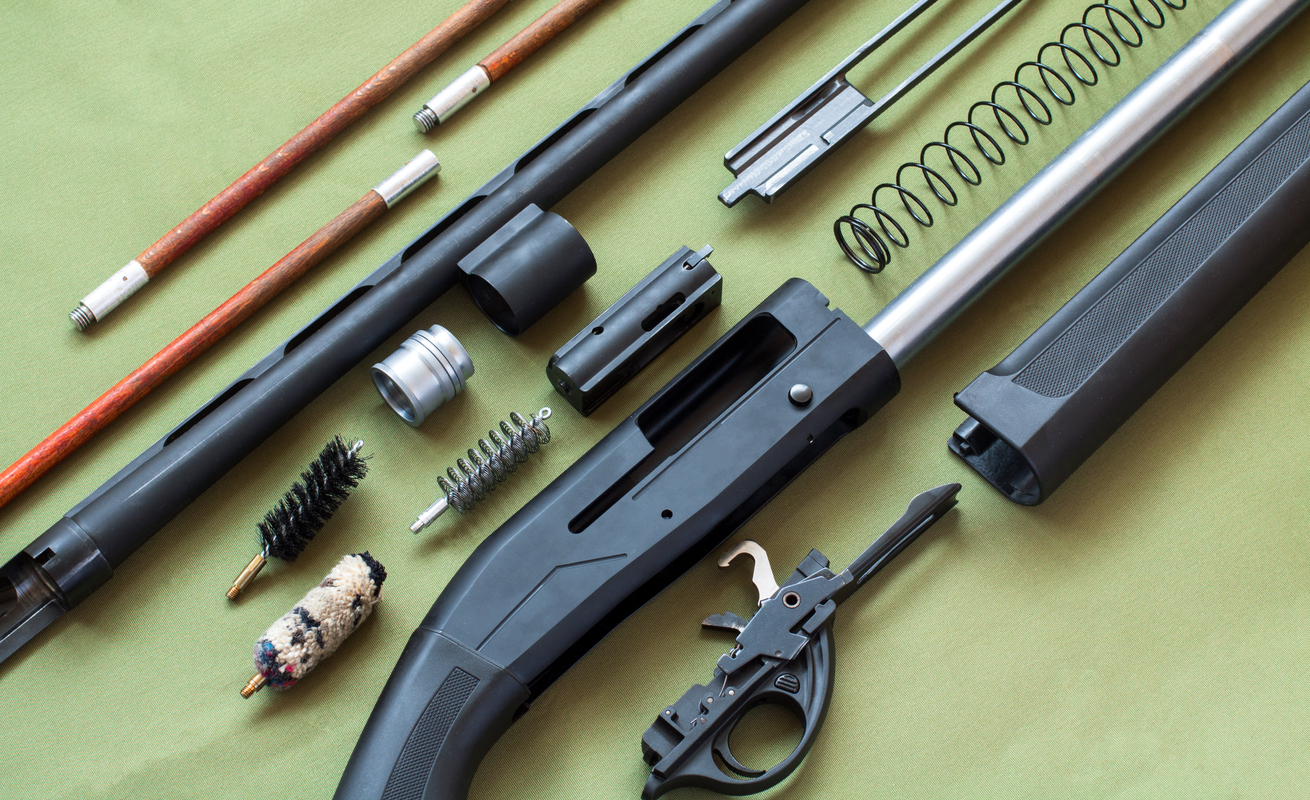
You will need a short cleaning rod designed for handguns; cotton patches; brass-phosphor brushes sized to the caliber of your revolver; and solvents and lubricants to complete the necessary gun-cleaning steps. Arrange these items within easy reach before you actually begin to clean the gun. Gun solvents are powerful chemicals, so make sure your cleaning station is well ventilated.
Cleaning the Chambers
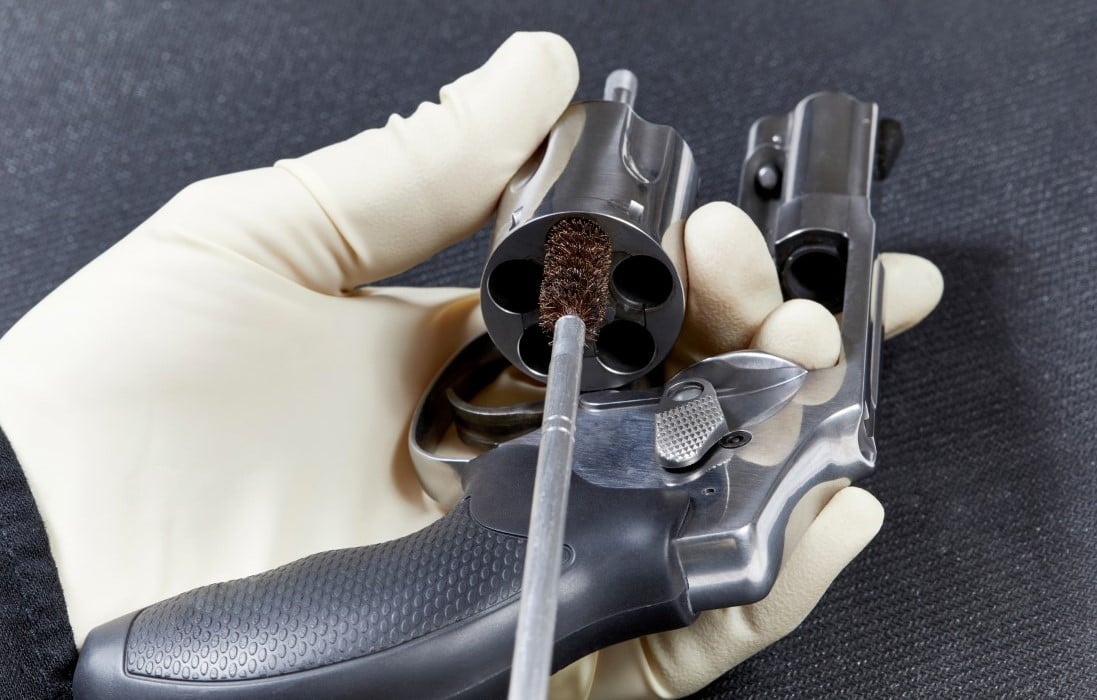
Many tutorials tell you to use the brush first, then follow with cleaning patches. The experienced shooter who taught me how to clean my first revolver reversed the process. I’ve never had a mechanical failure with my .38 Special, so I’ll repeat his advice here. Place a cotton patch on the jag or slot (an attachment at the end of the rod designed to hold a cotton patch), soak it in solvent (Shooter’s Choice is what I use), and then proceed to run the patch through each chamber. Depending on how dirty the gun is, you may need to use more than one soaked patch. You’ll notice that the patch will be covered with a gray coating as it exits the chamber. That’s powder fouling.
Now attach the brush to the rod, soak the rod in solvent, and push it through each chamber several times. This removes more fouling. Remove the brush, attach a clean dry patch, and run it through each chamber. It should come out clean. If not, repeat the process until the patch comes out free of fouling.
Barrel Action
Next, turn your attention to the barrel. Given the design of the revolver’s frame, you must insert the rod at the muzzle and work back to the cylinder. Repeat the above steps until the patch comes out clean.
Final Steps
You’re almost done. Before putting the gun away, soak a patch with light lubricating oil (I prefer Kroil) and run it through each chamber and the barrel. Use an aerosol gun oil (Rem Oil is what I use) sprayed on a rag to wipe down all the metal parts. You’re done.
Conclusion
Cleaning a revolver is an important part of maintaining peak performance. It’s really not very complicated, but it needs to be done on a regular basis.
FAQs
Q: What about copper fouling?
A: If you use jacketed loads that contain copper, you’ll need to perform an extra step to remove copper residue. After you’ve removed the powder fouling, use the same cleaning steps, but this time use a solvent formulated for copper removal. A patch run through the chamber and barrel that still has copper residue will have telltale blue streaks on it. That’s copper. Repeat the cleaning steps until the patch comes out clean. Keep in mind that solvents formulated for powder fouling and for copper fouling don’t play well together. If you intend to remove copper fouling after you’ve cleaned the gun with powder solvent, make sure all traces of the powder solvent have been removed before moving on to the copper solvent.
Q: Do I need to remove the grips?
A: You don't need to do this on a regular basis. Once a year, pull off the grips and clean the underlying parts. However, if the revolver has been exposed to water, you need to do this as soon as you get home to prevent rust buildup.
Q: There are so many solvents out there. What should I use?
A: For powder fouling, you can’t go wrong with Shooter’s Choice or Hoppe’s No. 9. For copper fouling, Sweet’s 7.62 or Bore Tech Cu+2 Copper Remover are good choices. Just remember that you need to use bronze-phosphor brushes with copper cleaning solvent. Nylon brushes won’t work.